Showing posts with label my own pattern. Show all posts

Tuesday, June 10, 2014

Star Pattern


There is something fun about a quick and easy project. These stars definitely fit into that category. I love making them when I have just a bit of yarn leftover from a project. Then I can embellish another project, like a coffee cozy, in seconds! The beauty of this project is you can really use any yarn or hook that you desire. And you can mix it up to see what you like best!

Please feel free to use this pattern for personal or small scale sales use. I would appreciate it if you linked back to my pattern if you sell a finished product online. If you sell it at a craft fair, no linkback is necessary. Enough of the small talk, here's what you really want... the pattern!

Star
Supplies:
  • Small amount of yarn.  I like worsted weight, but you can just use whatever you have and adapt the pattern accordingly.
  • Whatever size hook you want, I usually use a G or an H.
Abbreviations:
Ch - Chain
ss - Slip Stitch
sc - single crochet
hdc - half double crochet
dc - double crochet

Instructions:
Round 1 - Ch2, 9 dc in Magic Circle, Join in top chain 2.
Round 2 - Ch1, *sc, [hdc, dc, ch2, dc, hdc],* Repeat around (5 points and 5 sc), join with ss in first sc, fasten off.

Just like that, you're done! Sometimes I starch the stars to make the points really defined, and other times I just leave them as they are. Now you're ready to crochet some fun star embellishments!


Monday, July 1, 2013

Giraffe-tastic

This post has been awhile in the making. I actually made these back in February / March. My sister in law is pregnant with my first niece or nephew and I have not been able to stop making things for him / her. Thankfully, they aren't finding out what he or she is, so I can only do so much. They said that the nursery theme was animals, like giraffes and pandas. So I decided to crochet a few giraffe things.

First I made this amigurumi giraffe from Lion Brand. I love how the little guy turned out. Although, I feel like I have to tell people that he is a giraffe. hahaha


Next up I created my own giraffe hat! That's right. I made a pattern. I saw a few things that I liked in pinterest, but not the exact pattern. So I just went for it. I'm working on typing it up, if you are interested! I'm kind of in love with it!


Any other animal things that I should make for my new niece or nephew?

Saturday, April 13, 2013

Coffee Cup Cozy Pattern

I started making these coffee cozies a few weeks ago.  I was going to use someone else's pattern, but just could not find exactly what I wanted.  I designed this after my french press cozy pattern.  I am really happy with how this turned out, and I hope you have the same results.


Pretty gorgeous, right? I have given these as gifts and people seem to really love them. I have sent them simple (below) or adorned (above). Men prefer the simple way, but I just love the cute adornments! I have crocheted both stars and flowers and attached them. Lovely, I say. Then again, the simple looks fabulous too!


Please feel free to use this pattern for personal or small scale sales use.  Just don't go mass producing these in a sweatshop. I would appreciate it if you linked back to my pattern if you sell a finished product online. If you sell it at a craft fair, no linkback is necessary. Enough of the small talk, here's what you really want... the pattern!


Coffee Cup Cozy
Supplies:
  • Small amount of yarn.  I like worsted weight, but you can just use whatever you have and adapt the pattern accordingly.
  • Size H Crochet Hook (I have also used G and I, like I said, the pattern is adaptable)
  • Yarn Needle
  • Flower Embellishment (I like using this pattern, but feel free to use whatever one you like, or none at all!) or Star Embellishment (pattern to come soon!)


Abbreviations:
Ch - Chain
SS - Slip Stitch
HDC - Half Double Crochet

Instructions:
Round 1: Chain 14
Round 2: skip first 2 Ch, HDC in each stitch across, Ch2  (12 hdc)
Rounds 3 - 22:  HDC in each stitch across, Ch2 (basically continue in the same manner until your piece is approximately 8" when laid flat). On the last round, skip the Ch2 and Fasten Off.
Finishing: Lay the coffee cozy flat, lining up the first and last row.  SS in both rows to seam together.

Flip right side out and attach embellishment.


Simple, right? And lovely! Go ahead and make one today! Pair it with a gift card to a local coffee shop and you will have an excellent birthday gift!!
 

Monday, November 7, 2011

Carlisle Cullen's Baseball Scarf Pattern


This pattern has been over a year in the making, so you can imagine how excited I am to share it with you today! So excited that I made it a second post today instead of waiting til tomorrow! It does not take a year to make, I just got distracted by other projects and put it on the backburner. I wish I had finished it earlier though, because it is just so dang cute! Be forewarned -- this has a lot of weaving in. No two rows are the same color and you cannot carry over the yarn, so you have to weave in the beginning and end of each row.


Carlisle's Scarf


Materials:
Size H Hook (I crochet really tight, so use whatever works best for you)
Yarn Needles (for weaving in those really irritating ends, and there will be a lot)
Sport or Worsted Size Yarn in Black, Grey, and White (less than 1 skein each)

Abbreviation meanings:
Rnd: round
FC(sc): Foundation Chain, Single Crochet

FC (hdc): Foundation Chain, Half Double Crochet

sc: Single Crochet
hdc: Half Double Crochet
FO: Fasten off

Rnd1 (White): 16 FC(sc), 220 FC(hdc), 16 FC(sc). FO. Turn. (this is going to be the length of your scarf, so make sure it is the exact length you want).
Rnd2 (Grey): 16 FC(sc), sc into 1st FC(hdc) (17th stitch), hdc through all FC(hdc), 16 FC(sc). FO. Turn.
Rnd3 (Black): 16 FC(sc), sc across hdc (220 sc), 16 FC(sc). FO. Turn.
Rnd4 (White): 16 FC (sc), sc into 1st sc, hdc across through all sc (219 sc), 16 FC(sc). FO. Turn.
Rnd5 (Grey):  Repeat Round 4
Rounds 6 - 20: Repeat rounds 3 through 5 in the same order
Rnd21 (Black): Repeat round 3.

You are now done. You just have a million rows to weave in! I chose to use a FC for the beginning and end of each row just looks too thin if you only chain. Need help with stitche? Check out Lion Brand, and here you can find a video for the foundation single crochet and foundation half double crochet. Let me know if you need anything else!


There you have it. This beautifully striped scarf. I LOVE it so much! I'm not as Twilight crazy as I used to be, but I still like the scarf!

Thursday, September 22, 2011

Pattern Page


I finally created a page with links to all of the patterns that I wrote.  All three of them. haha  This took some major picnik time (okay a little) and fun.  Who doesn't love the polaroid frame!  Check it out, and let me know what other patterns you would like to see!


Check out the link here (or just click at the top of the page!)

Wednesday, June 1, 2011

Stars & Stripes

I am trying to create a pattern for these stars, but for now you can just take a peek!  Please excuse the weirdness of my ironing board.  It's just water -- not sure why it looks brown.  Do any of those stars look more starlike than the others?  Which do you like?  Or do they all look the same? haha


I also finished up the first in a new set of scrubbers from Big Girl Jewelry -- the ridged scrubby set.  I am  halfway through the second pattern, and excited to start the third!  I tried it once already, but I was tired and could not make sense of it -- so I went with the easier two!  Here's the Vertical Ridges Scrubby.

Monday, August 2, 2010

Coffee Cozy Patterns

This is my second pattern, and I am really excited about this one. It is pretty easy, but looks really cute! You need to know how to single crochet and double crochet. Both are relatively easy stitches. The challenge is going to be where you stitch. But enough with the intro, here is the pattern...


Pattern #1:
Supplies:
Less than 1 Ball of Yarn. I used something I had lying around the house, it's maybe a 4. Not super thick. (although after making the second one with red heart, I totally recommend that)
Size I Crochet Hook
4 Buttons
Needle

This pattern is for my "classic" Bodum French press. It is a tall and skinny 8 cup. I think 8.5" tall with a 13.5" circumference. If your French Press measures 7.25" with a 15" circumference, this pattern is not for you. That pattern is below :)


Abbreviations:

Ch - Chain
DC - Double Crochet
SC - Single Crochet

Instructions:

Row 1: Work 24 Foundation Double Crochet (or however many it takes to get a width of 6.5").

Rows 2 - 28: DC in loop below the top of the stitch. I skipped the first stitch and used the chain (from the row before) as the last stitch, to create an even line. If you just DC in each stitch across, it will have a minor ridge on the sides, I think. I did 28 rows, but just continue until you reach approximately 12". *

Rows 29 - 34: SC in each stitch across, like normal. This gives you a flat surface for sewing your buttons onto.

Sew your buttons onto the edge. I placed mine so that I would have one button above and below the handle, and 2 in the middle. This meant 1 button almost at the top, one at the bottom, and the others at 2.5" and 4.5", measured from the top. This was the hardest part of the pattern, as the yarn needle does not fit into the button holes, but I know you will find a way to make it work.

*[This video was my inspiration for the stitch (just the brim of the hat) and it should explain how to do it, she also demonstrates the foundation chain.]

Pattern #2:

This second pattern is for a shorter and fatter French Press, measuring 7.25" with a 15" circumference.  This is this size press that my parents have.  You are pretty much doing the same thing as the first pattern, just a little different dimensions.  The final size of your cozy will be 7" by 16".


Supplies:
Less than 1 Ball of Yarn.I used Red Heart Super Saver.
Size K Crochet Hook
4 Buttons
Needle & Embroidery Floss (to fit in buttons)

Abbreviations:
Ch - Chain
DC - Double Crochet
SC - Single Crochet
SCdec - Decrease SC (you will be crocheting 2 stitches into 1.  Insert hook into stitch, yo, pull through, insert into second stitch, yo, pull through, yo, pull through all 3 loops)

Instructions:

Row 1: Work 20 Foundation Double Crochet (or however many it takes to get a width of 7").

Rows 2 - 31: DC in loop below the top of the stitch. I skipped the first stitch and used the chain (from the row before) as the last stitch, to create an even line. If you just DC in each stitch across, it will have a minor ridge on the sides, I think. I did 30 rows, but just continue until you reach approximately 16". *

Row 32: You will now be working in the stitch (like normal), not the loop below. SCdec, 16 SC, SCdec. You now have 18 SC.

Rows 33 - 36: SC in each stitch across, like normal. This gives you a flat surface for sewing your buttons onto.

Sew your buttons onto the edge. I placed mine so that I would have one button above and below the handle, and 2 in the middle.  This time (the second time I did this), I used embroidery floss and a regular needle, so it would fit through the button.  It was much easier this time around!

*[This video was my inspiration for the stitch (just the brim of the hat) and it should explain how to do it, she also demonstrates the foundation chain.]


Please let me know if you make this pattern, and if you encouter any errors. And please send me pictures of your final products, so I can post them on the blog!

Saturday, July 3, 2010

July 3: Tent Scene Beanie - COMPLETE

Pattern #184: Bella Swan's Tent Scene Beanie

Originally, I was going to try and design my own pattern for this beanie.  However, since Amanda Dean has already created a crocheted pattern for the La Push beanie, I will just go with hers!  Here are some pictures from the movie, until I crochet this pattern myself.  Actually, I will just leave them here, because who doesn't like seeing Jacob? hahaha


-------------------------
Updated 3/17/2011: Mine definitely turned out very different, but it is because I wasn't really trying to make it look like the movie version.  I had some softer / paler yarn earlier, but  I used it for  the grocery bag that I made. haha  The colors that I used were bright, but perfect because they were already in my stash!  I also was crocheting in the dark, so some of my rows are a bit off (only that I did sc instead of hdc for a few rounds).


Tuesday, June 29, 2010

June 29: Carlisle's Baseball Scarf - COMPLETED

Pattern #180: Carlisle's Baseball Scarf

Wondering why you cannot click on the pattern link? Well, the pattern is not yet created. I have found many cool Twilight patterns that do not yet have crochet versions. I looked at this scarf and decided it would be a pretty easy switch. That and the pattern I planned on posting, Edward & Bella & Jacob finger puppets, seemed a bit weird and I knew I would not want them once completed! But if you still want to see that pattern, let me know and maybe I will post it later this week.

However, while you are waiting, a picture of the scarf from Nancy Fry (the link is to her knit version of the pattern):

--------------

Updated 11/7/2011: I finally finished this pattern and the scarf.  Definitely check out the pattern page for cuter pictures. :) I LOVE how this turned out!

Monday, June 28, 2010

Pattern: Bella Swan's La Push Beanie

In anticipation of Eclipse being released next week, I thought I would re-post this pattern from my other blog. Enjoy!

I wanted to recreate Bella's beanie, from the first movie and found this pattern, but it did not work for me. I made a bunch of changes, and feel pretty confident calling this pattern my own. This first pattern will make a tight beanie (I used Super Saver or something like that), the second pattern (scroll down) will make a thicker beanie, much closer to the one that Bella wears in La Push!
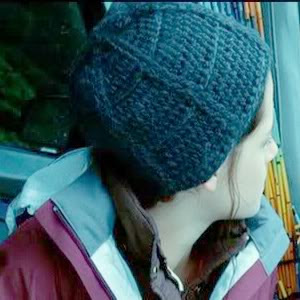

Pattern for smaller density yarn:
(I orignally used this pattern, but had to make a lots of changes, so this is my own take on it)
This is for standard yarn, maybe 3 ply?

Hook size: H/8-5.00MM

Abbreviation meanings:
Rnd: round
Ch: chain
Dc: double crochet
Fpdc: Front post double crochet
Bpdc: Back post double crochet
Ss: slip stitch
Fpsc: Front Post single crochet
FO: Fasten off

Ch 1 or use magic circle, Ch 2
Rnd 1: 12 dc in ring, join with 1 ss, (ch 2 doesn’t count as a dc) (12)
Rnd 2: ch 2, * 2 fpdc around next dc, 2 dc in next dc* rep from * to * around, join with 1 ss (24)
Rnd 3: ch 2, * 2 fpdc, 1 dc, 2dc in next dc* rep from * to * around, join with 1 ss (30)
Rnd 4: ch 2, * 2 fpdc, 2 dc, 2dc in next dc* rep from * to * around, join with 1 ss (36)
Rnd 5: ch 2, *2 fpdc, 3 dc, 2dc in next dc* rep from * to * around, join with 1 ss (42)
Rnd 6: ch 2, *2 fpdc, 4 dc, 2dc in next dc* rep from * to * around, join with 1 ss (48)
Rnd 7: ch 2, *2 fpdc, 5 dc, 2dc in next dc* rep from * to * around, join with 1 ss (54)
Rnd 8: ch 2, *2 fpdc, 6 bpdc, 2bpdc in next dc* rep from * to * around, join with 1 ss (60)
Rnd 9: ch 2, *2 fpdc, 7 dc, 2dc in next dc* rep from * to * around, join with 1 ss (66)
Rnd 10 - 15: ch 2, *2fpdc, 9 dc* rep from * to * around, join with 1 ss (66)
Rnd 16: ch 2, * 2 fpdc, 9bpdc* rep from * to * around, join with 1 ss (66)
Rnd 17-22: ch 2, *2 fpdc, 9 dc* rep from * to * around, join with 1 ss (66)
Rnd 23: ch 2, * 2 fpdc, 9 bpdc* rep from * to * around, join with 1 ss (66)
Rnd 24: ch 1, *2 fpsc, 9 ss* rep from * to * around, join with 1 ss, FO (66)

The beanie (see how it is tighter than Bella's and not as thick, it definitely needs to be made in the larger size!)

Pattern for Thicker Yarn (think Lion Brand Homespun)
Hook size: I/9-5.00MM
Abbreviation meanings:
Rnd: round
Ch: chain
Dc: double crochet
Fpdc: Front post double crochet
Bpdc: Back post double crochet
Ss: slip stitch
Fpsc: Front Post single crochet
FO: Fasten off

Rnd 1: Magic Circle Ch2; 12 dc in ring, join with 1 ss, (ch 2 doesn’t count as a dc) (12)
Rnd 2: ch 2, * 2 fpdc in same st, 2 dc in next dc* rep from * to * around, join with 1 ss (24)
Rnd 3: ch 2, * 2 fpdc, 1 dc, 2dc in next dc* rep from * to * around, join with 1 ss (30)
Rnd 4: ch 2, * 2 fpdc, 2 dc, 2dc in next dc* rep from * to * around, join with 1 ss (36)
Rnd 5: ch 2, *2 fpdc, 3 dc, 2dc in next dc* rep from * to * around, join with 1 ss (42)
Rnd 6: ch 2, *2 fpdc, 4 dc, 2dc in next dc* rep from * to * around, join with 1 ss (48)
Rnd 7: ch 2, *2 fpdc, 5 bpdc, 2bpdc in next dc* rep from * to * around, join with 1 ss (54)
Rnd 8: ch 2, *2 fpdc, 6 dc, 2dc in next dc* rep from * to * around, join with 1 ss (60)
Rnd 9 - 13: ch 2, *2 fpdc, 8 dc* rep from * to * around, join with 1 ss (66)
Rnd 14: ch 2, * 2 fpdc, 8 bpdc* rep from * to * around, join with 1 ss (66)
Rnd 15-20: ch 2, *2 fpdc, 8 dc* rep from * to * around, join with 1 ss (66)
Rnd 21: ch 2, * 2 fpdc, 8 bpdc* rep from * to * around, join with 1 ss (66)
Rnd 22: ch 1, *2 fpsc, 8 ss* rep from * to * around, join with 1 ss, FO (66)

Let me know if you notice anything wrong / hard to understand, as this was my first pattern!


Sunday, June 27, 2010

June 27: Bella's La Push Beanie (Twilight) - COMPLETE

Pattern #178: Bella's La Push Beanie

This week is the release of Eclipse - and my week long search for Twilight inspired patterns. Did you know there are way more Twilight knit patterns? This is also the first pattern I wrote on my own.

Picture of Bella in the hat, in the first Twilight movie (it's a picture of the movie, don't know what that means for copyright info...)


And my beanie:

Friday, May 7, 2010

May 7: French Press Cozy - COMPLETED

Pattern #127: French Press Cozy

Today is a different day than normal. I am designing the pattern! I finished the product, but I have not yet finished writing out the pattern.

Update: I have mine finished. Check out the finished pictures:


Here is the original post, which I am leaving up, because I like the inspiration!

The background info - my Mom requested a French Press cozy. However, I could not find any crochet patterns that I liked. I found 2 knit patterns, one by Derek & Lauren and the other by Mary Townsend, but nothing for crochet. So I started to make my own. About halfway through I realized that my Mom and I have different sized french presses. So I have to create a new pattern to fit hers. Eventually the pattern will suit both the tall skinny model that I have, and the short fat model that she has!

For now, you can see my inspiration from:

Derek & Lauren

and Mary Townsend
[all pictures are from their pattern sites on Ravelry]

Wednesday, April 21, 2010

Ladybug Hat Pattern

Today I start something new... posting my own patterns!


As you remember, back on March 11, I made a ladybug beanie. I was trying to follow a pattern, but just could not handle it. Something in the way it was written just did not work with my brain. Then I remembered that I have crocheted so many beanies that I do not really need a pattern. I did write it down, so you can use it if you want! This is my first pattern to be posted here. If you try it out, please let me know how it works for you and if it needs any changes! I used cheapo Lion Brand yarn from Big Lots (anyone know what I'm talking about). So it is pretty thin, probably a 3. If you want to sell a finished project from this pattern, please contact me (email in my complete profile).


Abbr:
ss: slip stitch
dc: double crochet
Notes:Unless otherwise noted, join each row with a ss at the end.

Supplies
Hook Size - J
Yarn Needle
Yarn - Red and Black Worsted Weight (less than 1 skein each)

With Black:
R1: 12 dc in magic circle [Check out this tutorial if you don't know what I mean]
R2: ch2, 2dc in each dc (24 dc)
R3: ch2, *1 dc, 2dc in each dc* [rep 12 times] (36 dc)
R4: ch2, *2 dc, 2dc in each dc* [rep 12 times] (48 dc)
Switch to Red:
R5 - R12 : ch2, dc in each dc (48 dc)
R13: ch1, *sk1, 4dc, sk1, ss* [rep from * to * til end], ss into first ch. Fasten Off. (this makes the ripple on the bottom)

Spots:
With Black. 10 dc in magic circle. slip stitch together and fasten off. Leave a tail long enough to sew the circles onto the hat. Make as many as you want, I made 6.

Completion:
I used the black yarn and an embroidery chain stitch to make the straight line down the front of the hat (red part only). Then I sewed (using the tails as thread) the spots onto the red part of the hat. You can look at my picture for reference. For antennae, I chained 8, then slip stitched into the top of the hat (again, see picture for reference point) and then single stitched up the chain until I reached the end. Tie off. Do this again, so you have 2 antennae.


This is what happens when your model does not want to wear the hat anymore! If you remember from the original post. The upper picture is a 1 year old in the hat, the lower picture a 3 month old.


All of the images of the hat being worn are from Fortuna Photography. They are fabulous.